Showing posts with label etsy. Show all posts

Friday, November 6, 2009

A Plea for the Old-Time Thanksgiving


I want to share the "Household Topics" column from the November 1896 issue of The Ladies World I have in my collection of vintage ephemera. It was the inspiration for my latest creation in my shop on Etsy. It truly is an appeal for remembering the Old-Time Thanksgiving. As you read it, remember, this was written over 100 years ago as a plea then! How much more do we need it today?
~~~~~~~~~~
"How many of us who keep Thanksgiving day with feasting and merriment consider the real meaning of the holiday? Of course, we go to church and hear elaborate sermons, admonishing us to 'consider our mercies,' and down in our hearts we form a little prayer of gratitude for the benefits we have received, and of supplication for a continuance of our blessings, and in thus making it our own we do right; but still we are losing something each year in the real sweetness of the day.


The English nation has changed much since its first festive observance of Christmas, but staid and matter-of-fact as the people are, they keep many of their olden customs. Still the men and maids bring in the mistletoe; still the Yule log burns on the English hearth; still the waifs sing beneath the windows and the boar's head is brought in in stately procession.

Compare this with our metamorphosis of Thanksgiving Day. Because we no longer live on puncheon floors and wear homespun, because our life is daily growing more complex, is not an excuse for forsaking the old-time Thanksgiving, but, rather, another reason why we should, for this one day, rest our over-strained nerves and go back to the simple, hearty holiday of old.


When I sit in a fashionable congregation on Thanksgiving Day, my mind sometimes wanders from the discourse. It does not dwell on the plumes and furs and velvets in the polished pews, but goes back to that little log hut in the mighty New England woods, and to the brave men who raised their voices in prayer on that first Thanksgiving Day.


And for what did they give thanks? Not that the Lord had blessed them with bountiful harvests, nor prospered their investments, nor kept their foes from them, but because He had sent the ship of relief, just in time to save them from starvation. They acknowledged His benefits in those days in a way to put to shame our indifferent spirit today. It takes more to put this generation in a thankful frame of mind than it did our Puritan fathers. Our granaries and storehouses must be full to overflowing, but they fervently thanked a kind Providence that they could be allowed 'a peck of Indian meal a week to each person."

To put us in a thankful mood, our ship must be bountifully loaded with luxuries for our own; but the first Day of Thanks was for the ship that came into the offing bearing bread for the starving.


If we could all keep this blessed day in sweet and serene spirit, thankful for what we have, much or little, thankful even for the sorrow that the year has brought to soften and chasten our hearts; if we could throw aside unnecessary forms, making it an unconventional, old-time holiday for our families and for the wanderers that come back to us, what sweet memories, all our own, would be connected to the holiday."

There are yet a number of days left between today and Thanksgiving Day to make careful plans for a true celebration of gratitude, even in the midst of these uncertain times. Blessings to you and yours!

Wednesday, October 14, 2009

Will it Be a Handmade Christmas for You?

I support buying handmade, both as a buyer, a creativity coach, and because I also design and make items for resale. For more than those reasons, though, I support handmade because our world has become so less personal -- and I really believe it brings value to our lives when we connect with both the process and the designer.


We have raised six sons. When our oldest two were teenagers, we moved to a little half-acre in the country where we could have a larger garden and raise chickens for eggs. It was a real eye-opener for our sons to feed and care for the chickens who, in turn, produced wonderful extra-large brown, blue and green eggs for our table. Before that, they knew eggs were laid by chickens, but had no real connection to the process. Most of our world has no real connection with how something they purchase came into being, let along came to the store.


I plan to make it a handmade Christmas this year. Our family members met last week over Sunday Dinner and decided to either keep the cost of an item to $10 or less -- or make something to give. The women will each make one item another woman would like (not knowing who they are making the item for). They guys may make something, but knowing them, they will more likely buy a gift. Even then, my challenge is -- how many wonderful handmade items can you find for $10?  Here are a few of the handmade items I found for guys.

I really do believe there is something for everyone if you do a simple search on Etsy. I was truly impressed with what I found. Here is a great item for the guy who needs to carry business cards, but already has a stuffed wallet.  $7.50 - thebritboutique


For the guy who loves the special brew, why not this great item I found for just $6.99!   Beer Soaps at BeautifulSoaps


I know a couple of 20-somethings who would love this great leather and metal stud bracelet for $10. BeadSiam on Etsy


I have several artists among the men in my family. This great drawing case for just $5 would make a great gift! Handmade Drawing Case by rainbowfrogs77


I don't have time to knit this year, but I know my guys love these fingerless gloves -- and a great price! Just $8.00 at Fingerless Gloves by TheSlipStitch


Here's a perfect item for the coffee lover in your life. My hubby loves to ride his bike to meet a friend for coffee. I could see him wearing this on his wrist (keeping warm on an early morning ride) and then using it to keep his coffee warm while he chats away. And, it's just $5 (so I could get two and he could keep both wrists warm plus share one with his buddy)! Re-usable Coffee Cup Sweater by CuffeShop


Why not make it a handmade Christmas this year too?

Monday, September 14, 2009

Make a Hat


Wednesday, September 15th has been designated as "Make a Hat Day." As a theater costumer for a number of years, I made a lot of hats for a variety of productions. One of the best overall sources is Denise Dreher's book, From the Neck Up: An Illustrated Guide to Hatmaking. Although it is no longer being published, it is still available on Amazon, both some new copies as well as used.

In her book, Ms. Dreyer provides a glimpse into the history of hatmaking as well as a vast quantity of information on making a variety of different styles of hats through the centuries.


For my use in theater production, I especially appreciated her comments on design, which enabled me to create many different hats for the style of both the production and the wearer. Dreyer shares:

"In well designed hats the lines flow naturally into one another and lead the eye without any unexpected breaks or bends. Continuity must be maintained between all of the lines if the design is to be attractive. That is why soft, curvacious hats are usually trimmed with flowing ribbons and flowers while stiff, straight hats receive a more severe, tight hatband and flat bow.

"There are no pre-determined rules as to which lines best flatter which faces and figures. It is largely a matter of observation and experiment on the part of the designer. Through careful studies of people wearing hats, you will soon develop a good sense of this. Begin by trying several hats on yourself and note the changes."
There are a number of simple ways to make a hat if you don't want to start with a pattern. One I have used to good effect is to cover a straw hat with fabric and then add trims. The supplies you will need are:

* Designer fabric of your choice for covering the hat
* 1" wide grossgrain ribbon the measurement of the inside circumference of the crown plus 2" for overlap for making a sweat band (and for covering your raw edges of fabric from the brim cover)
* Fancy ribbon (minimum 1" wide) the measurement of the crown plus 2" for overlap for making the outer hat band (and for covering the raw edges of fabric where the brim and crown covers meet)
* Flowers, feathers and other trims to decorate the hat
* Glue (a heavy craft glue works best)

Step #1: To cover a hat, you must first take several crucial measurements:

* the diameter of the crown
* the circumference of the brim
* the depth of the brim (from where it joins the crown to the outer edge of the brim)

Step #2: To the diameter of the crown, add two inches. Then, create a circle based on that measurement. That will be your pattern for covering the crown.

Step #3: To the circumference of the brim, add one inch (for a seam allowance). That will be the length of the brim pattern. To determine the width of the brim pattern, double the depth of brim measurement you took and add two inches.

Step #4: Now, using the patterns you have made, cut one brim and one crown out of the designer fabric of your choice for covering the hat.

Step #5: One-half inch in from the edge of the crown you have cut from fabric, run a loose stitch (preferably by sewing machine) all the way around for gathering. Place the fabric crown over the crown of the hat and gather up the stitches until the crown fits smoothly. Carefully lift the edge and apply glue. Press the fabric against the straw hat crown.
Step #6: Take the brim fabric you have cut to the pattern and join the two short ends together, right sides together, sewing in a 1/2" seam. Press the seam allowance open. Then, fold the width of the fabric, wrong sides together and press all along the fold. Open back up and run a loose gathering stitch along BOTH long edges of the brim fabric (be sure you are sewing each edge separately).

Step #7: Place the brim fabric over the brim, one edge under the brim and the other edge on top of the brim (with the fold at the outermost edge of the brim). Pull the gathers up on each side, encasing the brim as you do so. Make sure the inside edge of the brim tucks just up into the crown on the inside and glue those gathers in place. The outer gathers can be covered more effectively with the fancy hatband should there be an slight gap. Glue the outer brim edge next to the crown.

Step #8: Now, using the grossgrain ribbon, cover the raw edges and gathers of the brim fabric, creating a sweatband. Fold the last bit of the ribbon before you glue it down so there are no raw edges of the ribbon.
Step #9: Using your fancy hat band ribbon, cover the gathers and raw edges on the outside of the had where the crown and brim fabrics join. Fold the last bit of the ribbon before you glue it down so there are no raw edges of the ribbon. I leave the top edge of the ribbon band open to help hide any trims or feathers I might add, gluing that down as I go.

Step #10: Trim your hat with flowers, lace, or feathers -- or all of the above! Hot glue can be effective at this point, especially if you want the placement to be "just so."

If you cannot find a suitable hat to cover, it is easy to make a hat from scratch. There are patterns available for different styles. The hat pattern I have available in my Etsy store is very versatile. Even though it is shown with a Victorian style (perhaps appealing to the Steampunk culture or Halloween costuming), different trims would give it a more modern appeal.


Hat Pattern:

Monday, September 7, 2009

Learning to Take Better Pictures


One of the criteria for taking good pictures, I'm struggling to learn, is using the manual settings on your digital camera. That, and choosing the best background and overall lighting. I have been working on taking pictures of one of my new creations for my shop on Etsy, and I'm having more trouble than I thought I would. I would like your help, please. Here are some pictures, the one above taken in a lighter room using my setting for tungsten light -- without a flash.


The second one is in a different room with overhead lighting and a wood table. I still used the setting for tungsten lighting, no flash. Any suggestions? Here's a close-up shot -- again, same settings.

Friday, September 4, 2009

Sunflower Splendor


The hail we got in our area this summer pretty well obliterated our tomatoes and vegetable garden, but the sunflowers have been amazing. I've never seen such a glorious array! It has been fun to use them in staging photos of my vintage items and artwork for sale in my Etsy shop.

I have also used them in simple bouquets for my desk. They always make me smile. I know it is bound to turn cold and they will bow their heads, giving up the last of the summer sun very soon. That's why I decided to write an ode to their cheery faces today.

Sunday, August 16, 2009

Recycling Vintage Handkerchiefs


I have been de-cluttering my sewing space so I have more room for creating. When I came across a dozen vintage handkerchiefs I had cut in half for a quilt top years ago, I just could not toss them out! I doubted my local charity would take them -- they would probably throw them away. I did not think it likely I could sell them. So. . .they sat on my desk for a few days. The more I looked at them, the more they spoke to me.

The day I took a trip to my local bead shop (Ka-Gina's Beads in Arvada, CO), inspiration struck. I found some great Pandora-style glass beads that reminded me of the hankies! After a trip home to get the handkerchief halves for matching, I was busy creating. In fact, I haven't been able to stop! They are so much fun to make. Each one includes vintage lace, loops of beads, little puff beads I have made to tie in the colors and even some vintage buttons!

The real fun came on the day I wore my first one to work. One of my co-workers (a young 25-yr-old) told me she thought they were every bit as great as the ones she had seen at Anthropologie! "But yours are unique and one-of-a-kind!" was the final compliment to seal me on giving them a shot in my store on Etsy. My daughter-in-law came to model them, so I just posted the first two up for sale today. The one you see here is one of my favorites I'll be posting up a little later in the week.

So, what do you think?

Sunday, August 9, 2009

Back to Creating


So why haven't I blogged since last Christmas season? Wow! If I'm honest, it's because I also haven't been honoring my own life mission statement! The first phrase includes "designing space to grow, empowering myself and others to be creative." Well, if you don't give yourself space to grow, it's pretty impossible to empower yourself or others to be creative -- DUH!

So, I decided that my day job just cannot take priority in my life anymore. Maybe that's because when a bad economic environment shakes up the hours and pay one for the job, you begin to ask yourself some serious questions about what you want to be doing with your time and energy.

Yep, I could say it has something to do with the job -- but it also really has to do with ME. What are the choices I've been making? Do I want to make different ones? Yes, I do -- so you will see me more often, I hope (unless I am very busy creating). Even then, I do want to share with you how I'm empowering myself in that creative process so I can truly honor the latter part of that mission statement about empower others to also be creative.

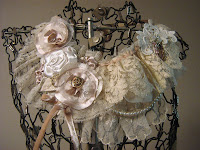
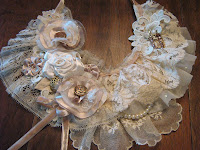
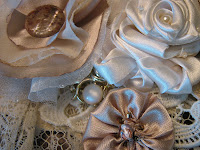
I've done a few of the things I was doing two years ago (they are posted now in my Etsy shop: http://vintagelegacystudio.etsy.com and I've included a couple of pictures here -- but I'm also exploring all kinds of new creativity! I am messing around with making flowers out of vintage '40s and '50s hankies, I'm writing about some of the things I've done in a "how to" on ehow.com (you can find my articles by my user name there: CoachJudiB) and I'm also researching ways of possibly bringing the books to print that I wrote several years ago. So, trail along with me on this journey and we'll explore some creativity together.

LinkWithin

Related Posts with Thumbnails